Saturday, July 28, 2007

The paint is on - and our inspiration for colors

Paint colors seem to choose themselves, if you're lucky enough to have a lot of clues left by the original decorators. We knew we wanted yellow (our theme in the house), with a red accent to help meld the kitchen in with the adjacent dining room; and of course the classic kitchen green color, which we've got as spot accents in the dining and living rooms. We found tiles with all three colors for the backsplash from an ebay vendor who happens to be here in Maine (http://www.newenglandarttiles.com/), and we were off. As we started taking off kitchen layers, however, our choices became even clearer, and helped guide us to the right tones.

First, we found this fab old scrap of linoleum underneath a cabinet, someone apparently left that time capsule. So we felt better about featuring the seafoam green, and including a bit of red.


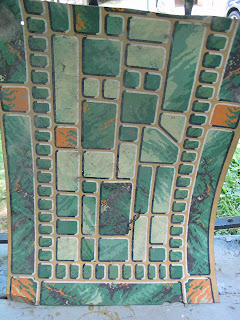
Next, we had always known that an older floor was green & grayish checkerboard, and a happy find at Marden's (our local salvage type retailer) got us all our flooring in a very similar pattern & colors for about $30. Can't beat that. The new tiles are solid vinyl, which apparently will last forever, and we'll be installing it & blogging about it later. This afternoon: fun with perfecting the underlayment. Ugh, long story, we'll get into it in the floor blog.

Then, when we pulled the old wallpaper, we found both yellow (multiple shades of a really similar tone to that we picked) and green under there! They outlined where old cabinets and other walls had been, interesting little mental reconstruction there.

So we've bought all our paint (gasp!) and we've now finished the ceiling - which included cladding a soffit where the old wall used to be with beadboard - and the walls. It looks awesome - no more technicolor dreamcoat! On to the floor ......

Saturday, July 21, 2007

Check out the view...

Sometimes I use a fisheye lens on my camera for my work (real job), and happened to have it here today. We thought, what a great way to show a before and after of the kitchen. The fisheye lens is like a panorama, all in one shot, if you can ignore the (somewhat psychedelic) distortion. We're just about done with wall & ceiling prep and will start painting tomorrow :)

So here's the before, and we'll post the after in (hopefully) just a few short days...enjoy the fisheye view!


Saturday, July 14, 2007

A new home for the fridge

The absolute worst problem with our kitchen (beyond tackiness, which is easily imagined away) was the refrigerator. When we moved in, there was a lovely harvest gold classic in the kitchen; we got rid of that one & Ken's grandmother generously helped us out with her old fridge before a move - it is super nice and way beyond our budget, and a great color, so thanks again! So the problem was no longer the fridge itself, but rather its placement. Note: its current placement is in the DINING ROOM, which is not any better! But it works for now...


Now, there's never a good place for a large elephant-like item in the kitchen; it just takes up so much space! But alas, we like cheese, ice cream, and all the other goodies it stores, so we must find a spot for the dang thing.

The problem with placement was that the fridge was right next to the main entrance to the kitchen, and the back (most used) entrance to the house. So everyone entering had to squeeze through between a wall and the sticking-out-almost-beyond-the-doorframe fridge. While we sure appreciate the Frank Lloyd Wright aesthetic of squeezing folks through a smaller area into a larger area, it really didn't work here. It pretty much made the kitchen awkward and cave-like.


We identified a corner long ago that could work for the fridge, and after many changes of mind, we went with it. We essentially enlarged the existing chimney bump-out, making a fridge alcove and just to the left, the space is perfect for a door-height pantry cabinet (more on that later, I just stripped GORGEOUS salvaged oak doors from the neighbors). Why is framing so satisfying? Love it!


The idea is to trim out the 2 alcoves to look just like our door frames, and the alcoves should end up looking like they've always been there, like we punched through a wall to place the fridge rather than built a wall to house it. I think the design works, the fridge is out of the doorway, and we still feel like we've got a wide-open kitchen, even giving up a few square feet of space.


Tomorrow, we're on to adding the microwave alcove, matching style, other side of the room. Sadly, I've loaned my camera for the weekend, so there'll only be after pictures on that one.


Oh, and dig our purple (mold-mildew resistant) drywall! It's pretty psychedelic in there, with the purple, old green paint, and stripes of old yellow pain. Gone soon...

Wednesday, July 4, 2007

Die kitchen ist kaputt!

We haven't posted since last week, because we've had several days off from work and so finally had time to tear apart the kitchen. So we never, ever have to wash or sweep that disgusting floor again! It's gone, gone, gone!

So, we pulled everything out except the good stuff (original plaster, trim, the well-done, leveled stringers across the ceiling). We've got the drawings ready and have most of our materials, and went gung ho. Besides tear-out, the first major accomplishment has been hanging the new ceiling (drywall, a step up from paper tiles we pulled down (yick!) but a step down from original plaster. Ah well, some compromises...


Problems so far: the floor had a small mountain range when you came in the door. We didn't know why, but suspected that we'd have to do some work with joists - not our favorite. It turns out, after some sleuthing, that the floor was only off-level for the last 2 feet or so. What happened was the house apparently had a larger back porch with a crawl space underneath. At some point, someone moved the porch wall back 2 feet to have a larger kitchen, and probably then put in the full basement underneath (now our laundry room). Ahhh, now things are making sense, Like why the concrete in the laundry room is a different color than elsewhere, or why the mudroom (now also half bath) was so skinny & disfunctional. And why there's a concrete half-wall in the basement between the main part and laundry room.

Here's how they dealt with the new floor transition:

We think they mis-measured the height, then it looks like they had a bad time finishing the cuts, and bashed the tops of the posts with hammers. Then scabbed in some garbage for some reason? Then ran the subfloor up the hill and said, ah, what the hell, good enough.


Fortunately, the bad part of the subfloor is exactly 3/4" higher than the good part, and the good part is completely level, so we cut out the bad part (back a joist or two for good measure) and when we just tested with the new subfloor (plywood), it sits level on top of the old subfloor in the good part, and the joists in the bad part. Way easier fix than expected! We'll tackle it Saturday.


Issue #2: wallpaper was AWFUL to get off. I'll just say this: it is never, ever OK to paint over wallpaper. The latex makes it pretty much impossible for any water to penetrate so you can't loosen the glue. Luckily, not much wallpaper.


Issue #3: they apparently cut up all the natural wood beadboard wainscoting and used it as shims for 70s plastic paneling. Argh! How tacky can you be? So we'lll go get some new beadboard...one design decision made for me by the house (it knows what belongs there...).


More later...

signing off, from the temporary kitchen (aka, dining room & living rooms...)