Saturday, June 23, 2012

Major progress - then root canal
We actually have made massive strides in the living room and kitchen parts of the basement reno. In fact, we had two sets of family stay down there over the past couple of weeks! Our goal was to have the kitchen cabinets (one side) in and ready to go so they could at least make their own coffee. Check! The living room side is actually about 90% done (photos later) and the kitchen on one side is at a similar stage.
However - these photos are from about a couple of weeks ago - before we finished all that up - because then I had a series of dental misfortunes including an out-of-town dentist, ending with a root canal after being totally out of commission for a while. (Amazing how a tooth plus painkillers can completely incapacitate a person!)
So here are the photos from the beginning of June, just before we finished a series of projects and cleaned up. More later this weekend, as I chip away at some trim and other smaller-scale items:
 The hallway, looking toward the upstairs door to the kitchen. The 'vintage' stair stringers essentially fell off in May, and were propped up by a 2x4 nailed to an old piece of framing. Super-posh, right? So we ended up shifting focus for a few days to the stairway and hallway. You might remember from last post that the hall basically looked like - how to say? - some kind of patched-together, post-disaster hovel. It's completely unbelievable what a boatload of joint compound and some paint can do (with Ken's excellent JC skills). Still have to paint trim, but it's now a light-filled, pleasant space instead of a scary tunnel to hell.

 Door to the furnace room. We're almost done closing off the infrastructure part of the basement. This used to be a troll door, about 5' high, which resulted in many a bashed forehead. There was no apparent reason for the troll door, since there's full door height available. I mean, why go to the trouble of dropping a header and cutting down a door? Silliness. This is a salvaged door from the ReStore, $2.99. It was missing the glass or whatever was in the top panel, but the rest was in great shape so we painted it and installed a piece of plywood painted with chalkboard paint in the top. Now we can write cute messages to our guests on the door (or nasty notes if we don't like them).
In a strange coincidence, we had picked up a panel from an old piano from a neighbor's discard pile on the curb and it was sitting around, waiting to be useful. Ken remarked that we should mill a nice chalk tray for the door right about the time I was pondering said piano piece and thinking of tossing it, and as I looked at it, I realized that the music tray on the upper piano panel was essentially a chalk tray, so we unscrewed it, cut about 1/4" off each end, and popped it in the door (coat of varnish too). It looks like it was born there! Our second fab piano usage.

And finally, sneak peek of the kitchenette. It's so teeny, so we can use all sorts of great leftovers and salvage. I got the sage green crackle art tiles at the ReStore (again, like a few bucks) and the white hex time (I've always wanted to have hex tile in the house!) at the ReStore a different day, when of course, I was on foot downtown and ended up walking about a mile with a bag of tile and a baguette in my arms. We've since finished the tiling (had to ask a friend with a wet saw to cut the left-side ones - this crackle glaze chips like mad with a grinder or scorer).
OK, that's about it until I finish some work and take glamour shots later today or tomorrow.
However - these photos are from about a couple of weeks ago - before we finished all that up - because then I had a series of dental misfortunes including an out-of-town dentist, ending with a root canal after being totally out of commission for a while. (Amazing how a tooth plus painkillers can completely incapacitate a person!)
So here are the photos from the beginning of June, just before we finished a series of projects and cleaned up. More later this weekend, as I chip away at some trim and other smaller-scale items:


And the stairs. We cut new stringers, making the stairs more conforming. Before, they had too little headroom at the bottom, irregular rises that were too steep, and a landing that was half-height at the bottom. What else? Oh, right, they fell off and we had to haul the laundry up & down by ladder for a while. That was really cool. So here they are, with temporary treads. We've since made the treads permanent and added risers as well. We re-used the old treads and risers when we could, since that was a lot of good wood and those things are pricey! Still need to paint. The wall is closed in with tile backer board in prep for installing one run of cabinetry (which is now in and update coming soon).

In a strange coincidence, we had picked up a panel from an old piano from a neighbor's discard pile on the curb and it was sitting around, waiting to be useful. Ken remarked that we should mill a nice chalk tray for the door right about the time I was pondering said piano piece and thinking of tossing it, and as I looked at it, I realized that the music tray on the upper piano panel was essentially a chalk tray, so we unscrewed it, cut about 1/4" off each end, and popped it in the door (coat of varnish too). It looks like it was born there! Our second fab piano usage.

And finally, sneak peek of the kitchenette. It's so teeny, so we can use all sorts of great leftovers and salvage. I got the sage green crackle art tiles at the ReStore (again, like a few bucks) and the white hex time (I've always wanted to have hex tile in the house!) at the ReStore a different day, when of course, I was on foot downtown and ended up walking about a mile with a bag of tile and a baguette in my arms. We've since finished the tiling (had to ask a friend with a wet saw to cut the left-side ones - this crackle glaze chips like mad with a grinder or scorer).
OK, that's about it until I finish some work and take glamour shots later today or tomorrow.
Sunday, April 15, 2012
The time it takes
It took about 2-1/2 hours to do this: install the flall (flooring on the wall) on the longest wall of the basement.

It took about a half hour to do this: install a ridiculously shaped set of patches on the stairway ceiling. Don't ask how the holes got this way.

It took about 12 minutes in the shower before my fingers puckered up enough to get the errant liquid nails to rub off.

It took about a half hour to do this: install a ridiculously shaped set of patches on the stairway ceiling. Don't ask how the holes got this way.

It took about 12 minutes in the shower before my fingers puckered up enough to get the errant liquid nails to rub off.
Sunday, April 8, 2012
Is this too boring to blog?
Drywall.

 Dusty and boring. And annoying. We're so, so glad that the rest of the house has wonderful, mostly intact vintage plaster. The basement needed something new, though - the old paneling and crummy moist drywall had to go years ago.
All this material came from the ReStore (moisture resistant drywall scraps, about equal to 2-3 sheets, which were $5 for the lot) and from a 'damaged' cart of DensShield (this stuff) from the big box. They wanted $11 (and I had a 10% off coupon to boot!) for the cart full of 12 sheets, so we took it immediately and worried about whether we could use it later.
Turns out that yes, you can use it as wallboard and it can be painted if you skim coat it with JC first. We were shocked to find that the existing stud walls in the cellar were indeed built on 16" center, so the sheets screwed right on perfectly - no long goofy cuts! It took seriously an hour or so to sheathe most of the room (we're only doing the top half again). Ken did the skim today and we are priming - PRIMING - tomorrow night! The primer will really help to make the space look less, umm, Technicolor Dreamcoat? It's very Spring Festival of Pastels down there right now.


All this material came from the ReStore (moisture resistant drywall scraps, about equal to 2-3 sheets, which were $5 for the lot) and from a 'damaged' cart of DensShield (this stuff) from the big box. They wanted $11 (and I had a 10% off coupon to boot!) for the cart full of 12 sheets, so we took it immediately and worried about whether we could use it later.
Turns out that yes, you can use it as wallboard and it can be painted if you skim coat it with JC first. We were shocked to find that the existing stud walls in the cellar were indeed built on 16" center, so the sheets screwed right on perfectly - no long goofy cuts! It took seriously an hour or so to sheathe most of the room (we're only doing the top half again). Ken did the skim today and we are priming - PRIMING - tomorrow night! The primer will really help to make the space look less, umm, Technicolor Dreamcoat? It's very Spring Festival of Pastels down there right now.
Thursday, March 22, 2012
Decidedly NOT helping
I took a few minutes on this un-seasonably warm day to sweep off the deck & patio. Actually, un-seasonably strikes me as far too gentle a word - maybe something like anti-seasonably? At any rate, it was hot and sunny and July-ish for Maine. I was sweeping for a couple of minutes on the other side of the deck from Frankie, and I turned around to see this little excavation:


I guess he was pointing out that we still need a half dozen bricks in that corner.
Some 'helpers' apparently need more direction than I am used to giving. On the other hand, perhaps he can be enticed to till the garden for us...


I guess he was pointing out that we still need a half dozen bricks in that corner.
Some 'helpers' apparently need more direction than I am used to giving. On the other hand, perhaps he can be enticed to till the garden for us...
Monday, March 19, 2012
Last light
Since it's the last day of winter, posting about light seems appropos.
This weekend a landmark event occurred: Ken installed the last - LAST! - light fixture in the house. Period. The whole damn house. We did all the wiring a bit ago, but had to wait until the ceilings were done in the cellar to actually add the fixture to the orphaned wire - and after a Herculean Saturday of ceiling-ness, we installed it on Sunday.
The ceiling in the future living room area has been done for a week or so, after a month of scrubbing, whitewashing, and varnishing above my head. Arm...falling...off....
In the future kitchenette area, the rubber met the road. This was the area where we basically routed all the infrastructure for the house, because it is next to a utility room. So the ceiling couldn't simply be cleaned and done - it needed cladding.

Enter the gorgeous old boards from last post. The idea is to create something that looks like whitewashed undersides of subfloor, but dropped to hide the wirey mess. I haven't felt so guilty in a while - we scrubbed them clean and then - gasp - whitewashed and cut up those awesome old 5/4" x up to 12" boards (up to 12' long, too) to fit between the joists. (We used up oh-so-much scrap 1 by as cleats on the joists to carry the boards. Sweet!) Don't anyone dare comment that we should have planed them and sold them for a zillion dollars to yuppies for flooring - we know! But we paid $40 for the load, we had them here, and that's what we bought them for.


And there was light. And today, we rested (well, went back to our day jobs).

This weekend a landmark event occurred: Ken installed the last - LAST! - light fixture in the house. Period. The whole damn house. We did all the wiring a bit ago, but had to wait until the ceilings were done in the cellar to actually add the fixture to the orphaned wire - and after a Herculean Saturday of ceiling-ness, we installed it on Sunday.
The ceiling in the future living room area has been done for a week or so, after a month of scrubbing, whitewashing, and varnishing above my head. Arm...falling...off....
In the future kitchenette area, the rubber met the road. This was the area where we basically routed all the infrastructure for the house, because it is next to a utility room. So the ceiling couldn't simply be cleaned and done - it needed cladding.

Enter the gorgeous old boards from last post. The idea is to create something that looks like whitewashed undersides of subfloor, but dropped to hide the wirey mess. I haven't felt so guilty in a while - we scrubbed them clean and then - gasp - whitewashed and cut up those awesome old 5/4" x up to 12" boards (up to 12' long, too) to fit between the joists. (We used up oh-so-much scrap 1 by as cleats on the joists to carry the boards. Sweet!) Don't anyone dare comment that we should have planed them and sold them for a zillion dollars to yuppies for flooring - we know! But we paid $40 for the load, we had them here, and that's what we bought them for.


And there was light. And today, we rested (well, went back to our day jobs).

Sunday, February 19, 2012
Need some wood?
Anyone remember the Presidential debate in 2008 when GWB said this? I think we were rolling on the floor - it was so goofily uttered. But we recently needed some wood. My mission over the past month has been to find old boards. Anything old (we are going to whitewash them) - barn boards, attic boards, subfloor boards. Whatever! Lots of them and decent widths.
The board quest is because in the kitchen area of the cellar, we need to basically make a dropped ceiling, and we plan to make it look like the rest of the cellar ceiling, but just to create panels that look like the underside of subfloor, and hang them down lower. We ran all the wires and other ugly stuff in the kitchen area to keep the rest of the room clear, so we just have one section to cover up.
By the way, I'm done scrubbing the ceiling in the living and kitchen areas and have moved on to whitewashing - sweet!

First I found a guy on craigslist, sort of nearby but we could make another errand in the general vicinity. The guy said I should call his dad. They advertised wood salvaged from old barns that could be made into flooring or whatever - and in the photo, it just looked like a giant wood storage barn. I was salivating. Our budget, as per usual, was as close to $0 as possible. So, I asked if they had any crummy old scraps for cheap - he said sure, they had seconds in a pile that weren't suitable for flooring and would probably work.
So, we loaded ourselves in the truck and took off down un-marked roads (partly dirt) in search of the lumber barn. The dad of the guy we emailed was there. We walked past heads and entrails of hogs he had just slaughtered (nice), and up rickety stairs, being admonished not to step off the 'obvious' places in the attic so we wouldn't fall through. There was the pile. As he began pulling mouse-poop-covered boards out, he started talking about price, and said something about $5 a board foot (for rotten poopy seconds? C'mon, man!). I did my best negotiating but in the end we left empty handed rather than spend several hundred $ on not great lumber - and we only had about sixty-two bucks with us anyways!
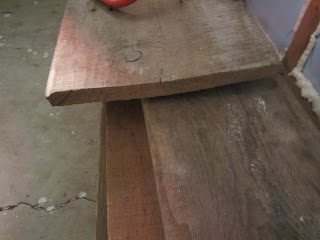
Back home, I grumpily typed a 'wanted' email and put it on the e-bulletin board at work. Next morning, a guy emailed and said he had a bunch of old boards in the basement he'd love to get rid of. And was only about 10 miles away. Back in the truck - and we went down cellar to find the motherlode - a whole pile of 5/4 barn/subfloor boards, properly aged, and up to 12" wide! We gave him something like $40 for the pile and quickly packed it up and left! The boards are almost too nice to use - hopefully we'll have extra and can make something sweet with a few pieces.

 We are almost done with final insulation and we have some time off in a couple of weeks - the plan is to finish up a bunch of ceiling work and maybe even get to wall sheathing very soon!
The board quest is because in the kitchen area of the cellar, we need to basically make a dropped ceiling, and we plan to make it look like the rest of the cellar ceiling, but just to create panels that look like the underside of subfloor, and hang them down lower. We ran all the wires and other ugly stuff in the kitchen area to keep the rest of the room clear, so we just have one section to cover up.
By the way, I'm done scrubbing the ceiling in the living and kitchen areas and have moved on to whitewashing - sweet!

First I found a guy on craigslist, sort of nearby but we could make another errand in the general vicinity. The guy said I should call his dad. They advertised wood salvaged from old barns that could be made into flooring or whatever - and in the photo, it just looked like a giant wood storage barn. I was salivating. Our budget, as per usual, was as close to $0 as possible. So, I asked if they had any crummy old scraps for cheap - he said sure, they had seconds in a pile that weren't suitable for flooring and would probably work.
So, we loaded ourselves in the truck and took off down un-marked roads (partly dirt) in search of the lumber barn. The dad of the guy we emailed was there. We walked past heads and entrails of hogs he had just slaughtered (nice), and up rickety stairs, being admonished not to step off the 'obvious' places in the attic so we wouldn't fall through. There was the pile. As he began pulling mouse-poop-covered boards out, he started talking about price, and said something about $5 a board foot (for rotten poopy seconds? C'mon, man!). I did my best negotiating but in the end we left empty handed rather than spend several hundred $ on not great lumber - and we only had about sixty-two bucks with us anyways!
Back home, I grumpily typed a 'wanted' email and put it on the e-bulletin board at work. Next morning, a guy emailed and said he had a bunch of old boards in the basement he'd love to get rid of. And was only about 10 miles away. Back in the truck - and we went down cellar to find the motherlode - a whole pile of 5/4 barn/subfloor boards, properly aged, and up to 12" wide! We gave him something like $40 for the pile and quickly packed it up and left! The boards are almost too nice to use - hopefully we'll have extra and can make something sweet with a few pieces.


Subscribe to:
Posts (Atom)


