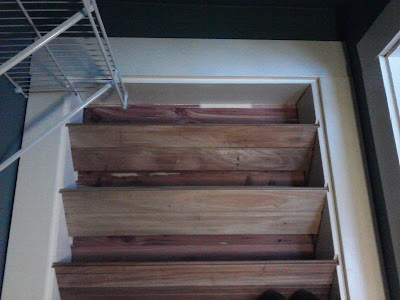
Still thinking about the basement. In the meantime, we've realized that we've been overlooking a pretty major project that spans many upstairs rooms: finishing all the windows. Ugh.
As we've done a variety of rooms, we've called many of them done when we still had one last project left - usually stripping the window sashes, and doing miscellaneous window-repair tasks. A pile of window stops found during the last cellar cleaning reminded us, then when we realized we can't put the interior storms in without the stops around our bedroom windows, it suddenly became fairly important to get some work done on this front.
So, I'm declaring this the Winter Project of 2010-2011. I've begun stripping the stops for our bedroom. Hopefully we can get them back in by the end of the weekend. Snow on the ground is a good motivator for getting drafts sealed up...then I'll chip away at the rest of them all winter, and leave the stinky painting and staining for spring. The stripping really is the worst part.
I need checklists for morale, so here's the one that will live on the fridge till I'm done.
What's bad for morale is remembering that each sash above is really a pair of sashes, so I have twice as much work to do as it looks like. Let's repress that thought for a while.
Here we go...
Friday, November 26, 2010
Sunday, November 21, 2010
So this is how the other half lives?
Ken very kindly helped a friend do some electrical work on his cabin. In exchange, the guy wanted to do something for us - so we jumped at the chance to have some 'free' help.
We chose...the rocks! We got another (last!) pallet of rocks back in May, and laid them out to complete the stepping stone path around the front and side yards. We then dug in about 10 of them. Then summer got a hold of us and we were involved in loads of other projects. So most of the rocks have been sitting on top of the ground - perfectly positioned - since then. The good news is that they killed the grass underneath, which makes the soil infinitely easier to dig out.
The better news is that the friend thought that digging in our rocks would be a great trade for Ken's help. So he's been here several days on and off setting them down in the ground. He's got almost all of the largest section done - and it's looking fantastic. It's super-cool to come home and find someone doing your project for you! Very weird, and such a nice treat.
So, here they are - hopefully the oil delivery guy won't spend all winter tripping on them now.
Monday, October 25, 2010
Ta-dah!
Chairs are done. Here's an enhanced view of the label from the other day:
And here they are in progress (the one on the right is post-refinishing):
And after:
This time I took the easy way out and used and antique furniture refinisher - just cleaned up the chairs, lightly sanded off the paint and other goo, and then applied. Then, beeswax. For the chair that didn't need all the new parts made, I'd say it was only about an hour's worth of work - super cinch! It seems to be perfect for projects like this - when the original finish is pretty good but there are some imperfections, and it would just look a little better brightened up. Two thumbs up!
Saturday, October 23, 2010
Crawford chairs, part I
Today I'm working on a bunch of projects that have been languishing in the cellar or garage. This is part of the ongoing project: Cleaning up the Cellar and Garage So We Can Eventually Start Fixing Them Up 2010.
I got this pair of oak, unpainted chairs at an antique store last year for $20 (for BOTH, thank you!) I thought I'd quickly tidy them up and reupholster, and have a nice study pair of chairs that we can put - somewhere. I don't know where. I have this strange chair addiction and I just can't control myself - so we'll find a corner in which to shove them when done.
Last night I started assessing them. One is in very good condition. There are a few places where some A-hole apparently bumped them with a roller full of white paint (what, could you not move them out of the room you were painting, lazy ass?). And the upholstery is just so tacky. Easy fixes, both. A few dings give it nice character. And I think someone once replaced one stretcher - even though they appear to have maybe used maple, they did a nice job so I'm not messing around with it.
Note that the UNDERSIDE of the seat frame is made from gorgeous 5/4 quartersawn oak. Damn, they had nice scraps back then!
The other one is in not so great shape, but it's not terrible.
Someone screwed right into the face of 3 of the 4 legs to 'fix' it.
Also, there's no seat. And, it's missing a stretcher.
And missing a seat support.
But look at the back:
Overall, not such hard things to fix. But a bit more work.
This second chair still had much of its label, which indicates it's from the Crawford Chair Company. Here's more info on that company (thanks, Internet!). So I think these are actually some decent chairs with interesting history.
The label - what's left of it - says: "Crawford Chair...Grand Ledge...High Grade...".
And did I mention they're sturdy as hell? I love oak!
Wednesday, October 13, 2010
Step on it, Batman!
Now that we're thinking about some new projects, a good garage cleaning was way overdue. So, we spent part of Monday (well, Ken spent it all - I had meetings all morning) diving in and clearing it out. He emptied absolutely everything from the very, very cluttered garage/workshop.
I got home to a driveway that was completely packed with more stuff than we imagined. So we put together a very large pile of scrap wood for Freecycle (gone as of this evening!) and re-arranged and re-organized the keeper tools and materials.
I'm pleased to say it was a big success - you'd hardly even recognize the space, and you can actually move around in there. We really had let it go - like we always do - toward the end of the trailer project.
Tuesday, I had the day off for real. So, at the end of Monday, I left myself a few piles in the driveway, promising to deal with them on Tuesday. One: Shed Step. Two: Bat Houses. Yes, I said bat houses. Three: Sort out all the fasteners/hardware.
I won't bore you with #3, but I'm just about done. Finally. Sorting. Zillions. Of. Screws. And. Nails. Yikes.
#1 - Shed Step: Since we had stupidly fashioned a quick, temporary step after building the shed, the step dropped way down the list. Key mistake: don't make a temporary fix if you really want to do a permanent fix sometime in the near future. It took us, oh, about 40 minutes - 18 months later! - to build the 'real' shed step: 4 or 5 chopsaw cuts on the treads, 3 skilsaw cuts to make the supports and then angle cuts for the decorative edge, and then about 5 minutes of nailing. Ridiculous. But - I LOVE the step! It's so much nicer than the wobbly, non-cedar temporary fix.
#2 - Bat houses. For some reason, once we realized (again, last year) that we had a bunch of leftover cedar from the deck and shed projects, I became obsessed with the idea that we should use it to build bat houses. We do have a bat that flies around the house at dusk in summer, and I dislike mosquitos intensely, so supporting the bat would be cool. So I plowed through the cedar pile and put together all the parts for a Bat House design I found from Mammoth Caves. I ended up with five 'kits', then after a quick bike ride to the hardware store for $1.50 of screen and $1.00 of galvanized nails, had them all together. I felt a bit like I was doing a shop class or girl scout project - it was a bit silly.
Now, We just have to give away a few bat houses - I really only wanted one!
Sunday, October 10, 2010
Gearing up again
So we're bad, bad bloggers. Although our trailer blog is pretty up to date... that's what's been taking up so much time. Now, though, the trailer is just about done and we're refreshed and renewed to begin again on big house projects.
On deck: the cellar. When we bought the house, the dingy, brown carpeted, 70's paneled cellar was considered 'finished' (a questionable designation), with a main 'great room', a bedroom, and a 3/4 bath. Pretty good stuff overall.
Then it flooded. We've since fixed the problem, between getting the sump pump fixed, re-grading the yard, and generally fixing the drainage. Oh, and we pulled out all the carpeting, paneling, walls, hung ceiling, etc. What's left is a lovely, stud-walled cellar with a grimy 3/4 bath.
The plan is to totally re- do it. Luckily, this will mostly mean re-surfacing everything. We want to put in a little kitchenette so it will be a totally pimped-out guest suite/in law apartment, expand the bathroom so the door doesn't hit the toilet (!) and add the laundry room to the new bath. Currently, laundry is done in the back-back of the basement, which has a raised floor, the oil tank, and no redeeming features - and is going to become just a storage room.
Floor will be something like epoxy paint on the concrete, and a couple of indoor-outdoor throw rugs. Walls will be plastic beadboard or tile halfway up, then probably paperless drywall to the top. Ceiling - we're going to leave the exposed beams, and then paint or whitewash the bays (underside of subfloor). I've seen this in a This Old House cottage, and it looked totally cool.
And, of course, a tiled shower in place of what now resembles the creepy phone booth in which Dr. Who flew around.
A trip to the ReStore yesterday galvanized this shower plan - we happened upon these beautiful white hex tiles, which are almost a half inch thick and look hand-cut! Right after the manager told me he'd loooove to get some tiles out of there. Loud and clear - and 5 boxes of these came home with us ($60, by the way - score!). Each box says "Mrs. Wheat's Bath". Mrs. Wheat apparently had good taste and too many tiles (or changed plans). Her loss, our gain. We'll need accent tiles (2x2, like the green one I'm auditioning here), but otherwise Operation Assemble Basement Parts is rockin'. We almost have everything we need, and will be sketching and prepping to hopefully work on it this winter.
Thanks for checking back in - hopefully the next post won't be so long.
Sunday, August 8, 2010
Outdoor kitchen
I used to work on a farm, and make pickles, jam, and relish most of the day. It was probably the best job ever. So, every year I make a couple of batches of pickles & jam or jelly. Our garden was pretty bountiful this week, so pickles it was. I hunted down a recipe for something - anything! - that used zucchini and summer squash, and I did a batch of these zucchini dills (they're not bad - kind of sweet & sour - and used all of the zucchini and summer squash we had!). Dilly beans and big batches of cucumber dill pickles with my trusty old recipes were a must-do. Had to go to the farmer's market to get all the pickling cukes - we didn't happen to grow 15 pounds of them!
Canning has been a bit of a challenge - our glass-top range isn't recommended for it. But - we have one of those big propane-powered burners that we can set up outside (usually for lobster), so we made a temporary outdoor kitchen for me today. The furniture was all about function (no form!) and was 2 sawhorses with a piece of plywood on top next to the 'stove'.
It worked great! We got about 40 jars of the different pickles, and cleaned out the garden a bit. No more creative zucchini dinners for a couple of days, at least!
While we were outside, our neighbor gave us a few extra tomatoes. Ours are just about to turn red, but she had loads already. We had already pawned off zucchini on her last week, so it was our turn to take the surplus. No complaints here!
Sunday, August 1, 2010
Amazing non-bungalow
This week I was in Woodstock, Vermont for work, and got a chance to tour the Mansion at Marsh-Billings-Rockefeller National Historic Park. Also got to do some hiking, which was equally fantastic. Here are a couple of photos from outside the house (no cameras allowed inside):
Detail at the top of the porch - I love this Aesthetic style, even though it can be a bit much. It looks so great on summer 'cottages'.
View from the back/side of the house. The house originally had a mansard roof, but on the other side, it was remodeled (By the Billings family, if I'm remembering the tour properly) to have a peaked roof. They left the mansard on this wing, and I love the pleasing visual of the vine leading up to the chimney on this side.
And from the front. Pretty awesome, and they had a huge Dutchman's Pipe vine that I'm totally jealous of creeping all across the side of the porch.
Totally worth the trip up to VT if you're in New England, and the tour was a great value - something like $8 and it was about 90 minutes! I'm told they also have some tours focusing on the great art collection in the house (a Thomas Cole and some Bierstadts, among others), and the architecture. I'll have to go back for those...
Tuesday, July 20, 2010
Outdoor grocery store
This time of year is so great - everything just really started to produce in the garden. Snap peas are just ending; zucchini, cauliflower, and my lovely French filet beans are kicking in. Lettuce is going strong; herbs threaten to take over the entire back yard. Peppers are starting, and we're on our third cuke. No need to go indoors to shop any more...
Excuse the blurry photo at dusk - but it's sooo lush out there I had to snap a shot (and the weeds are somewhat in control).
And today, I found another person who has agreed to take zucchini. Things are good in gardenville.
Excuse the blurry photo at dusk - but it's sooo lush out there I had to snap a shot (and the weeds are somewhat in control).
And today, I found another person who has agreed to take zucchini. Things are good in gardenville.
Sunday, July 11, 2010
Fateful doorstop
So I bought a doweling jig (which is soooo simple and totally cool) at a yard sale for $5 a couple weeks ago, and we've been using it for our trailer project. At the yard sale, the guy threw in this awesome, super-heavy brass (plated, but hey), gigantic antique door stop. I love old doorstops, and I figured I'd throw it in the "cool stuff for later" jar since every door has a stop right now and we really didn't need it.
Well, 2 days ago we opened the door too hard for the flimsy, crappy, lazy person's hinge pin doorstop we had installed on the back door. Fate! We had the new beefcake one ready to go - and because it was so cool, we were OK with screwing it into the nice re-finished baseboard. Fab!
Saturday, July 3, 2010
A bit of winter in the midst of summer
Not much happening in the house this summer - we're doing a bit more landscaping, growing some food in the garden, and working on this other project.
But - today I happened by the ReStore in the vain hope they would have a bit of rigid foam insulation for the other project mentioned above. After several prods and a lot of patience, the one guy got the other guy, who asked the boss about a supposed stash of rigid foam in the trailer, that no one apparently thought was for sale, but that the boss decided just then to let go.
And the trailer doors creaked open, and behold! There was insulation! I only wanted the one piece (a complete 4x8 sheet, mind you!) of 1/2" stuff, but then Guy #2 said, "well, I'd really like to get this all out of here now that we can sell it - don't you want some more?". And we eventually arrived at a deal - $55 for all the insulation in there (plus he threw in a big ol' sheet of plexiglas I had picked up).
This is what we got:
The 1/2" I originally went for, plus 2 sheets of 1" (2x8 T&G)
4 sheets of 2" (4x8 sheets! Score!)
Two packets of the thin stuff in Green certified energy star, exterior grade, etc., etc. AND a packet plus scraps of the pink thin stuff.
As we loaded it all onto the truck*, the Guy #2 says, "I think you got a pretty good deal, young lady". I told him I was quite sure I got a fabulous deal. And the cellar will be a heck of a lot more comfy when we insulate the walls - next summer's big project.
* which was a ridiculous procedure, because Guy #1 did not believe any of it would fit, and then he proceeded to comment about every step of me strapping it in (it fit fine). But then, I had to drive home with the wind whipping the whole way - it was quite breezy and our ReStore is in a big open area. I'm amazed we didn't float away...
Friday, June 18, 2010
Got your new issue of This Old House?
The July/August reader created one?
Crack it open and turn to page 22. There we are, on the Plant Tags story! (In the middle, the stamped concrete marker stones).
Funny thing is, this is probably the ONE thing we've done at the house that has been a kit, not an insane custom, handbuilt thing. Ha!
There are other cool plant tag ideas on the 'bonus' page online - I LOVE the license plate one.
Saturday, May 29, 2010
You call that a score? THIS is a score!
So if that blanket from the last post was a great deal, today I got a tremendous deal. The yard sale gods were smiling.
That's right, that's a box of un-used electrical supplies - enough for a whole basement, we think. The yard sale proprietors had bought it all to re-do a cottage then didn't do the work.
All sorted out, this is what we got for $7.50 (thanks to my hard and fast rule that one simply MUST haggle - it was originally $10, which was just as great a price).
With this find and the sink and three boxes of tile Susie (over at Bangor Foursquare) traded us, the basement project (probably slated for next summer) is coming together well, all by itself.
Monday, May 24, 2010
A blanket on a hot day
Score! I just stopped by the antique/vintage store in downtown Bangor for an iced coffee and a browse after getting out of a meeting, and I found this little FLW treasure for $27! Looking forward to a cool winter day to use it - but not yet.
It's in *pristine* condition (though we'll gently wash it anyways).
Almost as cool as the never-opened Scrabble game we got at a yard sale this weekend for $1...but not quite.
It's in *pristine* condition (though we'll gently wash it anyways).
Almost as cool as the never-opened Scrabble game we got at a yard sale this weekend for $1...but not quite.
Wednesday, May 12, 2010
Since it won't be this tidy ever again...
OK, so we never posted any "afters" of the bedroom. We still have about 3 tiny punch list jobs to do (Ken is doing one this very moment - sweet!), and I didn't have my camera for a while, but we actually did take some photos before I loaned it out that I never posted.
We never posted because we thought we'd do another round of fully-staged "afters", but this is a tough one: because we live (messily) in it, I'm not sure it'll ever be much tidier than in these first excited "It's almost done!" shots. So without further ado...
Before:
After-ish:
Yeah, that's an IKEA bed in a bungalow. The room is a bit more modern, but we didn't destroy any of the vintage stuff. Just sassed it up.
Monday, May 3, 2010
Go Bangor!
Still cleaning gardens and mulching. Still waiting for my camera back.
But - I was pleased to find that our little metropolis of Bangor was just listed in the Top 100 places to Live by RelocateAmerica.com.
They didn't include "has awesome bungalows" as one of the criteria, but we do! Of about 5,000 single-unit detached homes, some 285 or more are bungalows. And a whole bunch more are foursquares - so ubiquitous they call them Bangor Boxes. So - we've got character!
And a giant 1950s fiberglass statue of Paul Bunyan. Wow.
Thursday, April 29, 2010
Greening up
Spring fever has set in. We've been totally busy at work and spending every sunny moment we can trying to whip the yard into shape. The goal was to get an early start this year - and we're doing OK. There's a big pile of mulch in the driveway, and about half the beds have been cleaned, pruned, and mulched. Now we're just waiting for these babies to really fill in...
Lady's mantle (geranium-looking guys) in front, snowberry hedge, white astilbes (left front), white dome hydrangea along the porch wall, and a variety of bulbs, daisies, and artemisia in front of the fence. Everything's basically supposed to be green and white. More importantly, they all made it through the winter!
And from the front, the two wraparound beds (the left one was in the other photo; it's mirrored on the right). Our baby snowberries (future hedge across the front of the porch) are doing very well - they'll just take a while to fill in. Not bad for bareroot starts (or as Ken said, we bought some dead twigs and they came in the mail?!).
Sunday, April 4, 2010
Great friends, old wood, summer projects
We visited great friends this weekend down on the coast. Got to audition a new cocktail with Caribbean rum, and had a fantastic time in general.
And there was a bonus for all of us - as we stood on their newly-enlarged deck, they noted that some old deck railings were needing to go to the dump. Glancing over, Ken & I saw that they were actually in great shape and were pretty new treated lumber. Light bulb! Our first project this summer is going to be building piers on both sides of the front steps, and we need to start amassing some supplies (cheap!), so we loaded it into the truck (yay truck!) and hauled it on home.
A win-win, for sure. Not to mention the fabulous weather this weekend!
Monday, March 29, 2010
From doorway to shoe rack
So - the long-awaited shoe rack. You might recall that Ken, during demo phase, found an old, covered-up doorway hiding under wallboard on the right wall of our closet. Since our closet is small (by modern standards, but large for an old house), we were thrilled to find about 7" more depth on that wall. We had planned to install some IKEA shoe bins on that wall; they would have stuck out into the closet but would have worked fine.
Instead, Ken had a brainstorm - why not put in a kind of louvered shelf system that could be a recessed shoe rack? Brilliant, says I. And I got to work planning and scrounging wood to build it out.
First, we clad the back wall with cedar planks - they are thin (only about 1/4", so they take up less depth than drywall and they smell pretty too!), inexpensive, and easy to install. Because the studs for the wall of the abutting room were laid flat, we could liquid nails & solid nail the panels right on and not lose much depth. First we ripped out a useless stud that was just a nailer, running down the center of the doorway. If you wanted to, you could simply tear a hole in a wall and leave the studs, and just have 16" wide bays to store shoes.
This was an easy project (for a change!) - simply think of framing a door. Instead of putting solid 5/4 lumber to case the two tall sides (inside the jamb), we cut 45 degree, 3/4" grooves every 10-12" (wider spacing at the bottom for boots). Cutting the angled grooves was the hardest part of the project. We used the dado blade and it was a bit scary on the old Shopsmith.
We then trimmed out the doorway just like every other door in the house - 1-bys for the side trim, and a thicker board (we actually used a scrap old piece of window jamb that came with the house) for the header. Painted it and we were ready for Ken's louvers.
We planned to use some scrap flooring that we had in the garage, but after I goofed cutting the first piece, and then realized that we didn't have enough anyway, I took a trip to the handy-dandy ReStore to find 'anything 1 by'. And House Karma was with me - I found scraps of some Brazilian flooring out front - pre-finished even! - and then scrounged around to find more of it until I had 16 pieces that were 31" long, what I needed.
At home, we simply cut them all to length and popped them in - 2 per shelf, with the beads butting together and with a screw as a stop to keep them spaced off the back wall about 1-1/2". They are not attached, so they can be removed for cleaning or any other thing you might want to remove them for.
And voila - storage for about 30 pair of shoes! We were able to get rid of a horrid back-of-the-door shoe rack and a big box-cubby thing. And I still have more room for shoes - time for a shopping trip!
Wednesday, March 24, 2010
We DO have something to wear!
We've had a tough time finding things to wear lately, because our clothes have been crammed in a variety of nooks and hung on backs of doors all over the house (and in bags, and baskets, and on floors...you get the picture). Last night, the paint was dry and all the parts were together in the closet - so we were able to move clothes back in! And today I'm wearing a shirt I haven't worn a hundred times over the last few weeks.
A shout-out to Ken, who successfully hung all the new hardware and fittings. It's an irritating job and he tackled it with gusto.
Before, the shrimpy (my) end of the closet:
After (note that, unlike previous - dare I say, lazy - painters, we actually painted all the baseboard and didn't just quit when we got to the part you can't see from the bedroom):
Before, view into the closet from the room (it all looks so grubby now, ick):
And after. Stay tuned to see how the newly-discovered door jamb, now cedar-clad, will become a shoe rack, next weekend...
And the middle part of the closet:
By the way, if you live in the Bangor area and plan to re-do a closet anytime soon, get thee to Marden's - they have a gigantic assortment of ClosetMaid stuff right now (all the fixtures & fittings you see here cost us a whopping $32, which is a total steal). It's all a bit dirty - like it sat in a wet warehouse too long - but it's brand new and cleans up easily. The corner shelf piece was about $10, and normally is $20 or more if not from a salvage store!
Subscribe to:
Posts (Atom)